部署CentOS8
1. 安装最小系统,注意要选择Standard模块,避免常用工具没有,并注意配置好IP
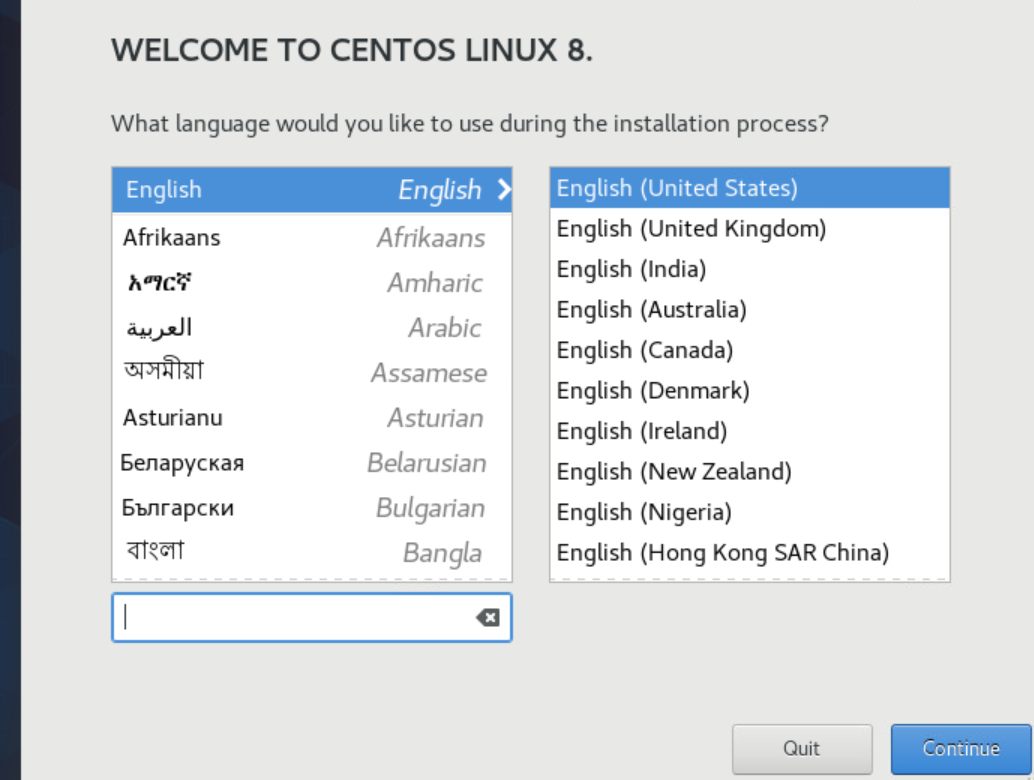
设置时区: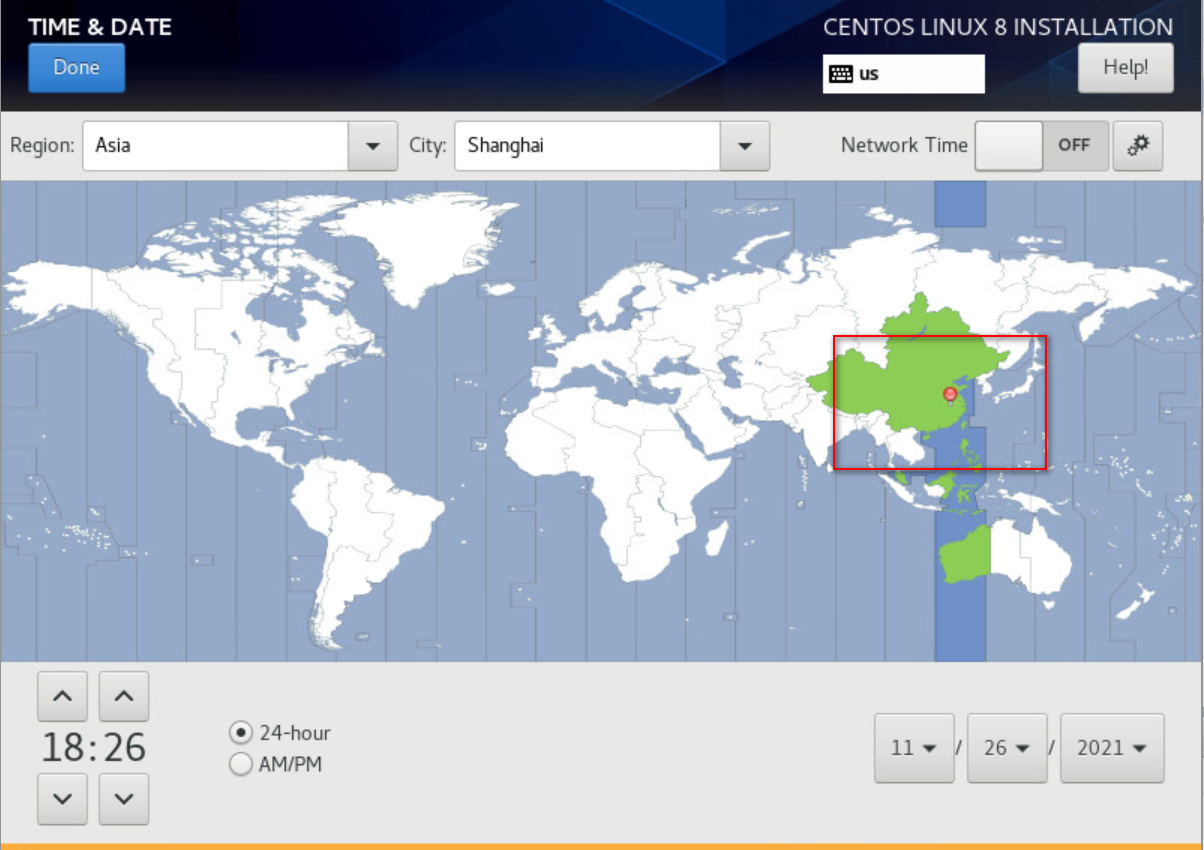
设置root密码(rss123):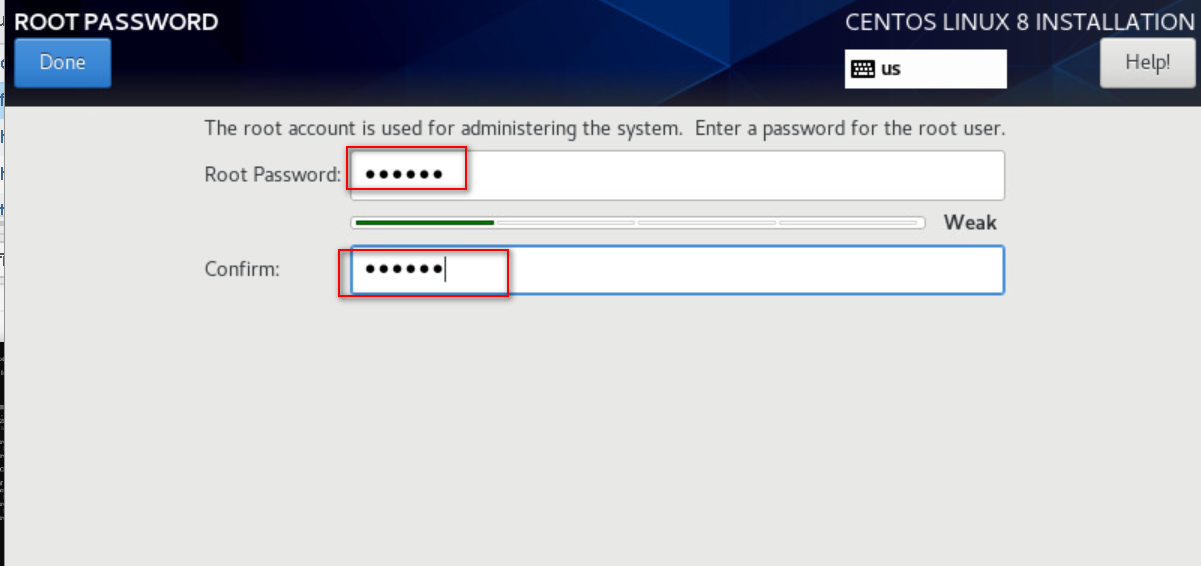
安装软件,最小化安装: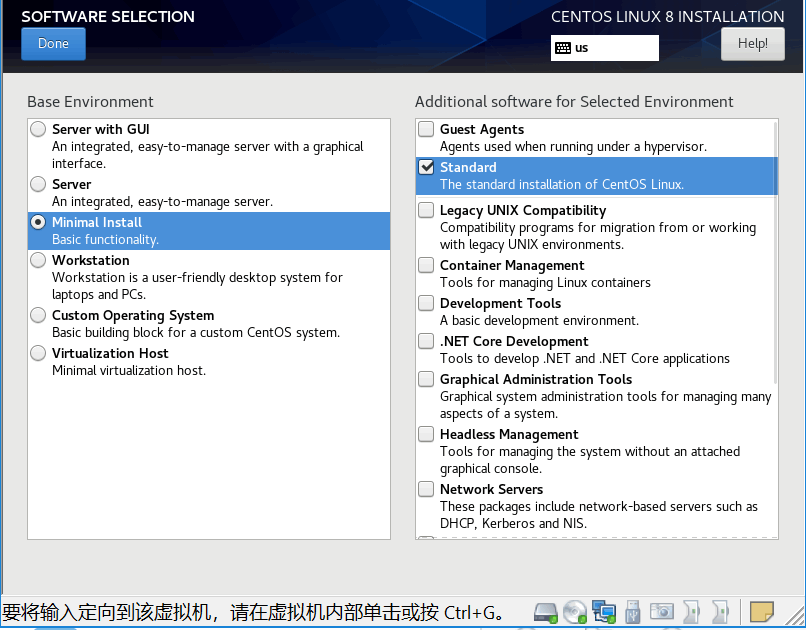
磁盘分区一定要选择custom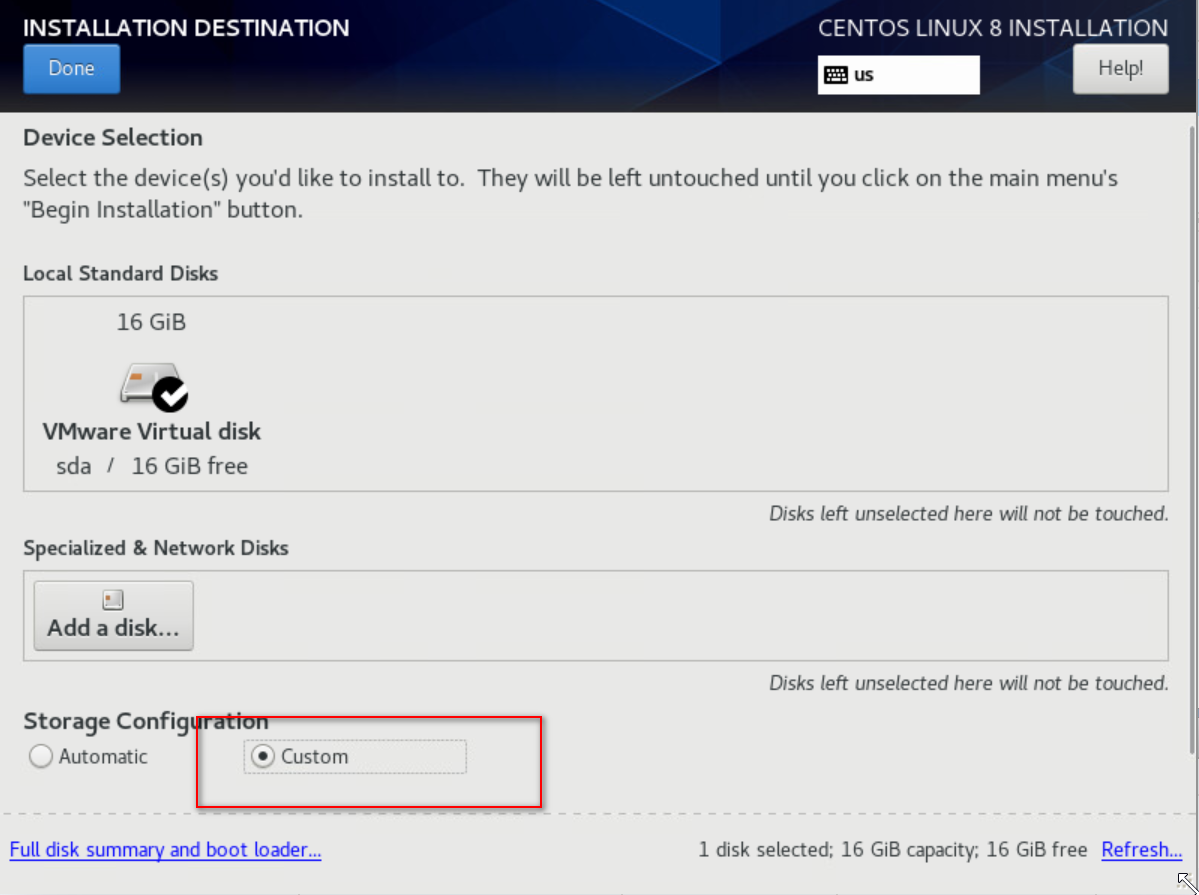
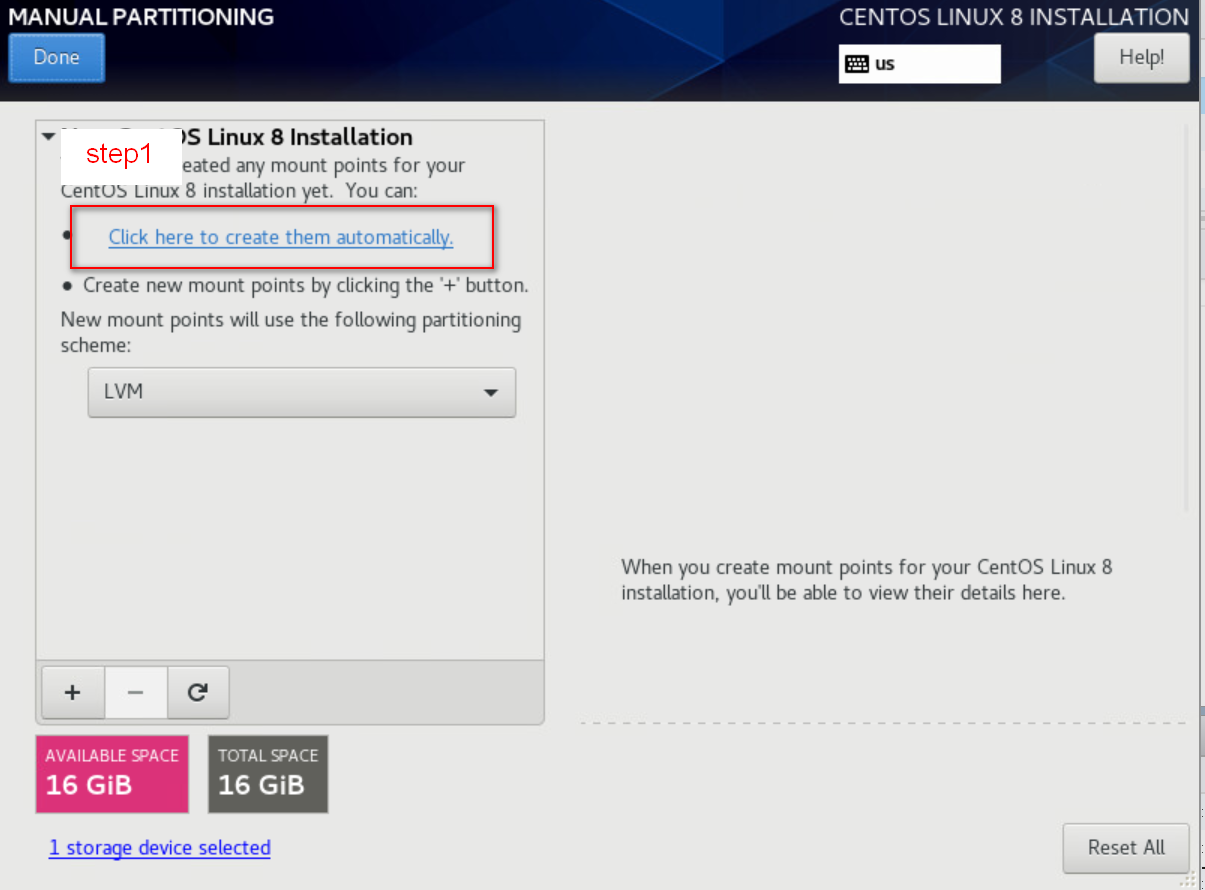
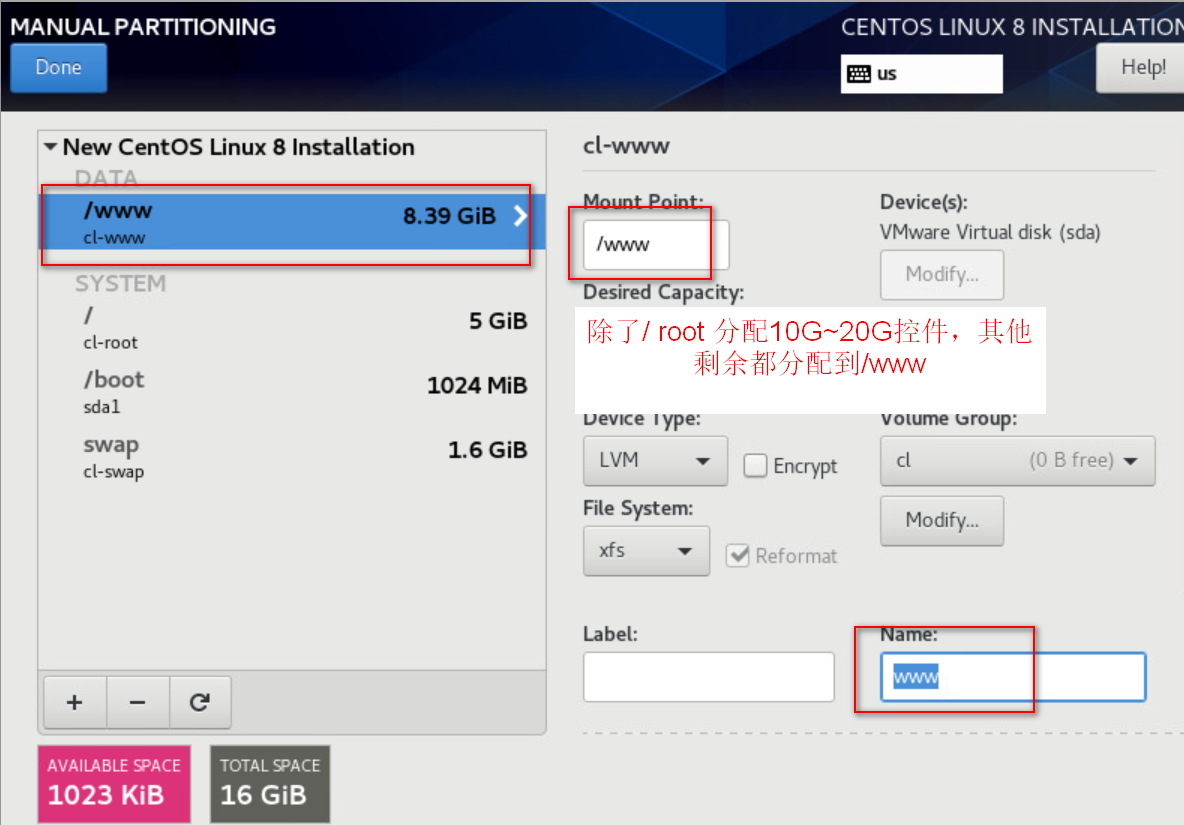
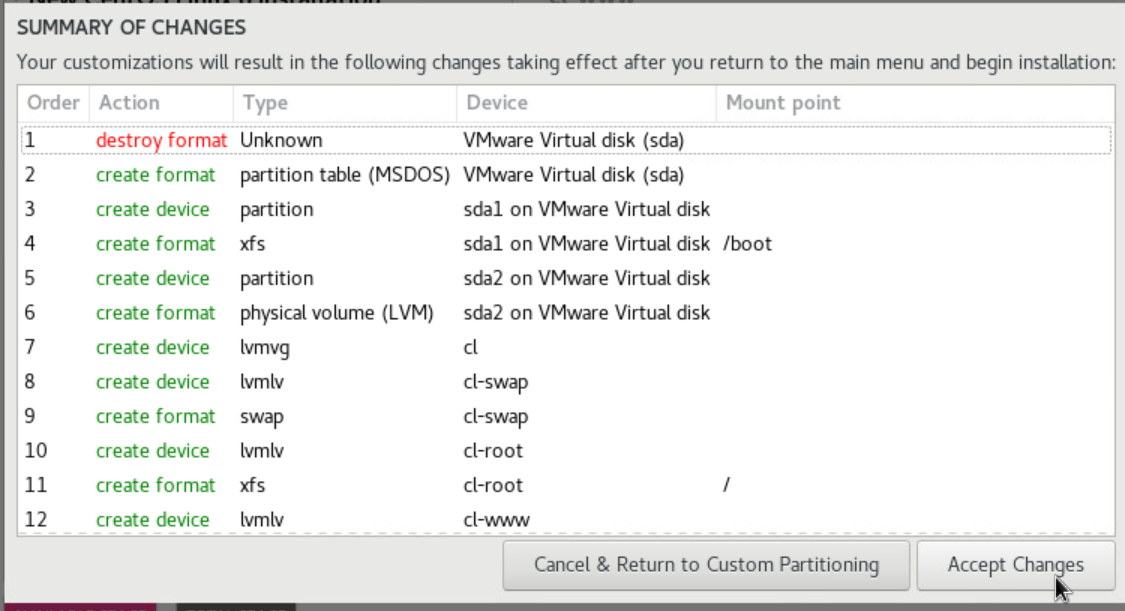
配置网卡: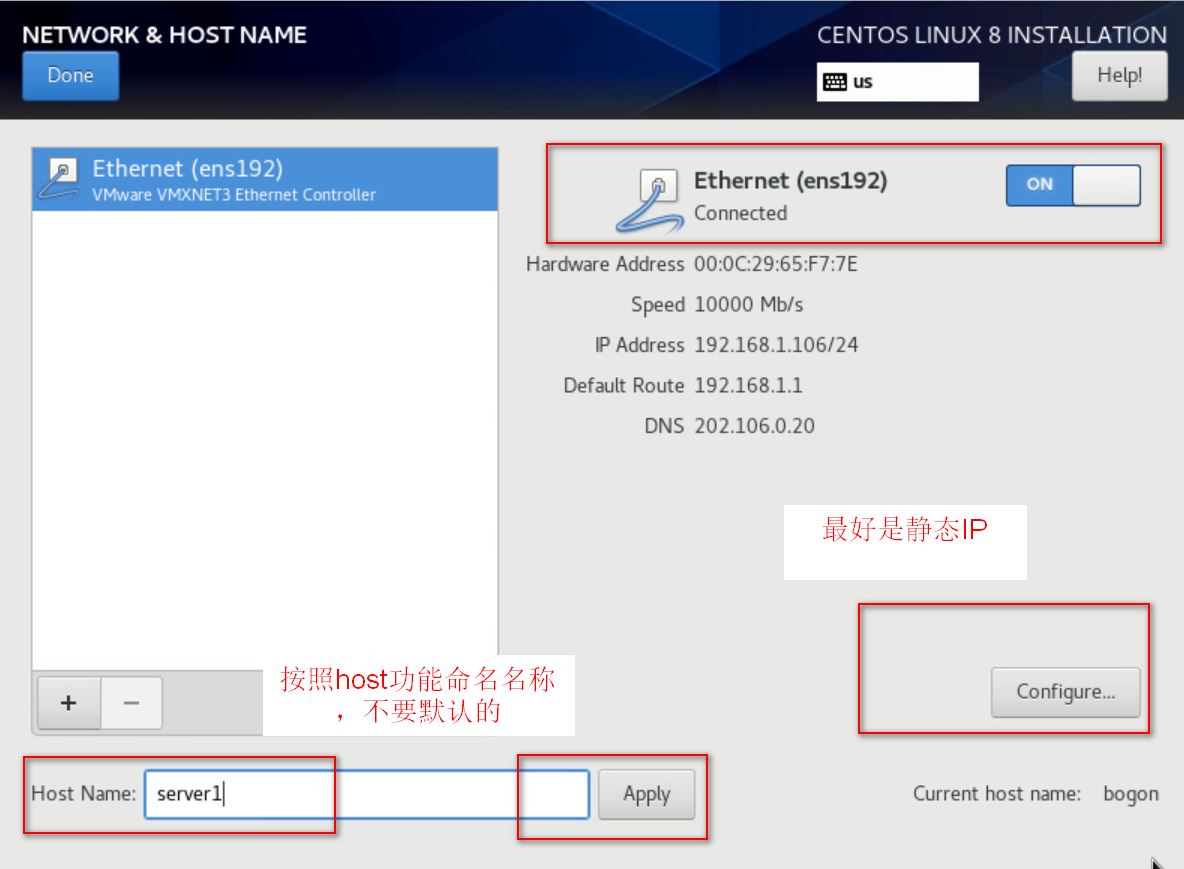
完成后点击安装完成
2. 更新阿里云镜像(可以直接备份移除/etc/yum.repos.d/目录下面的repo,然后复制阿里云的):
默认可以启用dnf自动镜像:
vi /etc/dnf/dnf.conf
fastestmirror = true      # 主要就是添加这一行即可。
因为8.x以下已经废弃,需要继续使用:
sed -i -e 's/mirrorlist/#mirrorlist/g' -e 's|#baseurl=http://mirror.centos.org|baseurl=https://vault.centos.org|g' /etc/yum.repos.d/*.repo
类似:
#mirrorlist=http://#mirrorlist.centos.org/?release=$releasever&arch=$basearch&repo=BaseOS&infra=$infra
baseurl=https://vault.centos.org/$contentdir/$releasever/BaseOS/$basearch/os/
[baseos]
name=CentOS Linux $releasever - BaseOS
#mirrorlist=http://#mirrorlist.centos.org/?release=$releasever&arch=$basearch&repo=BaseOS&infra=$infra
baseurl=https://vault.centos.org/$contentdir/$releasever/BaseOS/$basearch/os/
gpgcheck=1
enabled=1
gpgkey=file:///etc/pki/rpm-gpg/RPM-GPG-KEY-centosofficial
[extras]
name=CentOS Linux $releasever - Extras
#mirrorlist=http://#mirrorlist.centos.org/?release=$releasever&arch=$basearch&repo=extras&infra=$infra
baseurl=https://vault.centos.org/$contentdir/$releasever/extras/$basearch/os/
gpgcheck=1
enabled=1
gpgkey=file:///etc/pki/rpm-gpg/RPM-GPG-KEY-centosofficial
[plus]
name=CentOS Linux $releasever - Plus
#mirrorlist=http://#mirrorlist.centos.org/?release=$releasever&arch=$basearch&repo=centosplus&infra=$infra
baseurl=https://vault.centos.org/$contentdir/$releasever/centosplus/$basearch/os/
gpgcheck=1
enabled=0
gpgkey=file:///etc/pki/rpm-gpg/RPM-GPG-KEY-centosofficial
[powertools]
name=CentOS Linux $releasever - PowerTools
#mirrorlist=http://#mirrorlist.centos.org/?release=$releasever&arch=$basearch&repo=PowerTools&infra=$infra
baseurl=https://vault.centos.org/$contentdir/$releasever/PowerTools/$basearch/os/
gpgcheck=1
enabled=1
gpgkey=file:///etc/pki/rpm-gpg/RPM-GPG-KEY-centosofficial
[appstream]
name=CentOS Linux $releasever - AppStream
#mirrorlist=http://#mirrorlist.centos.org/?release=$releasever&arch=$basearch&repo=AppStream&infra=$infra
baseurl=https://vault.centos.org/$contentdir/$releasever/AppStream/$basearch/os/
gpgcheck=1
enabled=1
gpgkey=file:///etc/pki/rpm-gpg/RPM-GPG-KEY-centosofficialwget -c http://mirrors.aliyun.com/repo/Centos-8.repo
cp Centos-8.repo /etc/yum.repos.d/CentOS-Base.repo
阿里云镜像文件8.5可用(https://mirrors.aliyun.com/repo/Centos-vault-8.5.2111.repo):[base]
name=CentOS-8.5.2111 - Base - mirrors.aliyun.com
baseurl=http://mirrors.aliyun.com/centos-vault/8.5.2111/BaseOS/$basearch/os/
    http://mirrors.aliyuncs.com/centos-vault/8.5.2111/BaseOS/$basearch/os/
    http://mirrors.cloud.aliyuncs.com/centos-vault/8.5.2111/BaseOS/$basearch/os/
gpgcheck=0
gpgkey=http://mirrors.aliyun.com/centos/RPM-GPG-KEY-CentOS-Official
additional packages that may be useful
[extras]
name=CentOS-8.5.2111 - Extras - mirrors.aliyun.com
baseurl=http://mirrors.aliyun.com/centos-vault/8.5.2111/extras/$basearch/os/
    http://mirrors.aliyuncs.com/centos-vault/8.5.2111/extras/$basearch/os/
    http://mirrors.cloud.aliyuncs.com/centos-vault/8.5.2111/extras/$basearch/os/
gpgcheck=0
gpgkey=http://mirrors.aliyun.com/centos/RPM-GPG-KEY-CentOS-Official
additional packages that extend functionality of existing packages
[centosplus]
name=CentOS-8.5.2111 - Plus - mirrors.aliyun.com
baseurl=http://mirrors.aliyun.com/centos-vault/8.5.2111/centosplus/$basearch/os/
    http://mirrors.aliyuncs.com/centos-vault/8.5.2111/centosplus/$basearch/os/
    http://mirrors.cloud.aliyuncs.com/centos-vault/8.5.2111/centosplus/$basearch/os/
gpgcheck=0
enabled=0
gpgkey=http://mirrors.aliyun.com/centos/RPM-GPG-KEY-CentOS-Official
[PowerTools]
name=CentOS-8.5.2111 - PowerTools - mirrors.aliyun.com
baseurl=http://mirrors.aliyun.com/centos-vault/8.5.2111/PowerTools/$basearch/os/
    http://mirrors.aliyuncs.com/centos-vault/8.5.2111/PowerTools/$basearch/os/
    http://mirrors.cloud.aliyuncs.com/centos-vault/8.5.2111/PowerTools/$basearch/os/
gpgcheck=0
enabled=0
gpgkey=http://mirrors.aliyun.com/centos/RPM-GPG-KEY-CentOS-Official
[AppStream]
name=CentOS-8.5.2111 - AppStream - mirrors.aliyun.com
baseurl=http://mirrors.aliyun.com/centos-vault/8.5.2111/AppStream/$basearch/os/
    http://mirrors.aliyuncs.com/centos-vault/8.5.2111/AppStream/$basearch/os/
    http://mirrors.cloud.aliyuncs.com/centos-vault/8.5.2111/AppStream/$basearch/os/
gpgcheck=0
gpgkey=http://mirrors.aliyun.com/centos/RPM-GPG-KEY-CentOS-Official
清华镜像(非stream无用):sudo sed -e 's|^mirrorlist=|#mirrorlist=|g' \
     -e 's|^#baseurl=http://mirror.centos.org|baseurl=https://mirrors.tuna.tsinghua.edu.cn|g' \
     -i.bak \
/etc/yum.repos.d/CentOS-*.repo电子科大(非stream无用):sudo sed -e 's|^mirrorlist=|#mirrorlist=|g' \
     -e 's|^#baseurl=http://mirror.centos.org/$contentdir|baseurl=https://mirrors.ustc.edu.cn/centos|g' \
     -i.bak \
     /etc/yum.repos.d/CentOS-Linux-AppStream.repo \
     /etc/yum.repos.d/CentOS-Linux-BaseOS.repo \
     /etc/yum.repos.d/CentOS-Linux-Extras.repo \
     /etc/yum.repos.d/CentOS-Linux-PowerTools.repo \
     /etc/yum.repos.d/CentOS-Linux-Plus.repo
### 3. 时间时区确认(Centos8)
使用systemctl start chronyd.service  启动chrony服务
使用systemctl enable chronyd.service  设置开机同步时间
使用systemctl status chronyd.service  查看服务状态

### 4. Centos配置网卡推荐使用nmcli:
重新加载ifcfg-ens192配置文件
nmcli connection reload #修改后,都需要reload一下
2)不重启系统,让网卡生效的3种方法方法1:nmcli connection up ens192(推荐)
方法2:nmcli device connect ens192
方法3:nmcli device reapply ens192
[参考](https://www.cnblogs.com/RXDXB/p/11660184.html):

### 5. 安装libreofifce:
yum install -y libreoffice-core libreoffice-writer
拷贝微软雅黑字体
cp msyh.ttc /usr/share/fonts/
更新字体缓存
fc-cache -fv
转换:libreoffice --headless --convert-to pdf:writer_pdf_Export --outdir /root/pdf /root/word/*.docx
### 6. 安装图像界面
安装GUI包
yum group list
yum groupinstall "Server with GUI"
开机启动图形化界面
首先使用ctrl+alt+f2切换到命令行模式,如果本身就是命令行模式就直接看下面的步骤
然后输入如下命令,查看当前开机启动模式
systemctl get-default
graphical.target代表开机时启动图形化界面
multi-user.target代表开机时启动dos界面
输入如下命令设置开机启动图形界面
systemctl set-default graphical.target
同理,如果想开机启动dos界面,就输入如下命令
systemctl set-default multi-user.target
### 7. 如何修改默认sshd端口
1)修改sshd_config配置端口
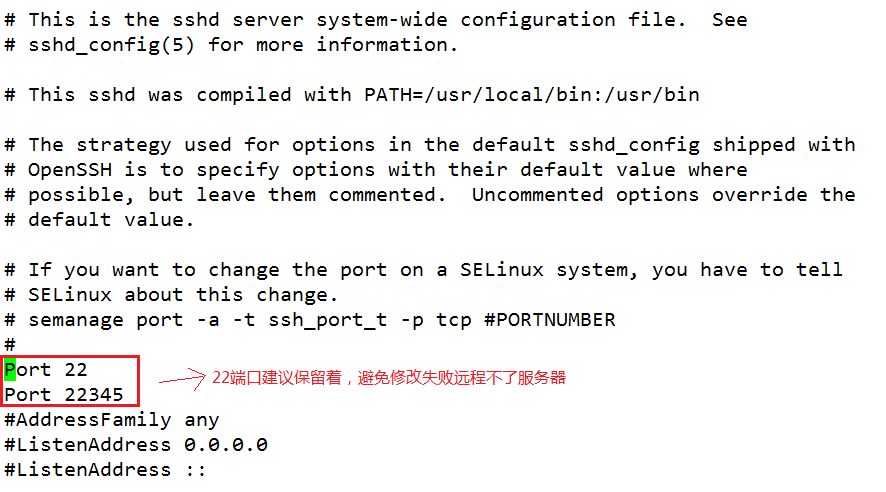
2)防火墙放行firewall-cmd --zone=public --add-port=22345/tcp --permanent
firewall-cmd --reload
3)SElinux放行semanage port -a -t ssh_port_t -p tcp 22345
semanage port -l | grep ssh
4)重启服务systemctl restart sshd.service
### 8. CentOS8 如何开启图形化Cockpit,并且修改默认端口(比如8090)mkdir -p /etc/systemd/system/cockpit.socket.d
vim /etc/systemd/system/cockpit.socket.d/listen.conf
ListenStream=8090
systemctl enable --now cockpit.socket
修改/usr/lib/systemd/system/cockpit.socket
> /etc/systemd/system/sockets.target.wants/
cockpit.socket -> /usr/lib/systemd/system/cockpit.socket
> [Socket]
ListenStream=8090
semanage port -a -t websm_port_t -p tcp 8090
firewall-cmd --zone=public --add-port=8090/tcp --permanent
firewall-cmd --reload
systemctl daemon-reload
systemctl restart cockpit.socket
### 9. 如果开启了Selinux,那么可能导致supervisor无法开机启动,请按照如下命令添加规则:
journalctl -xe
SELinux is preventing。。。
allow this access for now by executing:
ausearch -c '(ervisord)' --raw | audit2allow -M my-ervisord
semodule -X 300 -i my-ervisord.pp
### 10. 如果使用tar打包目录,并排除目录用法
比如: 备份 /www/wwwroot/www.genewill.com 网站,排除.git 和runtime目录, 并去掉/www/wwwroot目录结构
tar -cvjf 20210808_www.genewill.com.tar.bz2 --exclude=.git --exclude=runtime -C /www/wwwroot www.genewill.com
